
 Login
Login
 Stores
 Cart
Cart
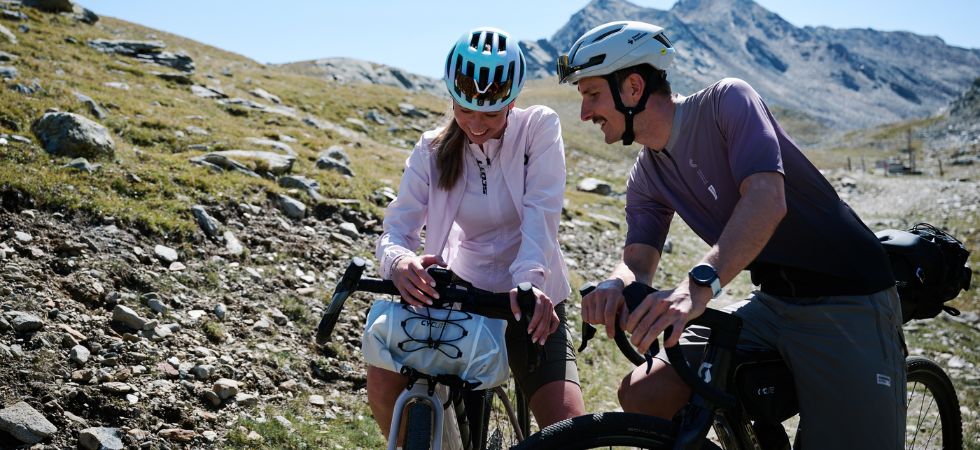
Get on your bike, leave the everyday behind and take only what you really need. Bikepacking is all about travelling light, packing smart and attaching your kit to the bike in a way that keeps the ride fun, controlled and comfortable. Whether you’re heading out for a long day ride, a hut-to-hut mountain bike tour or a multi-day gravel adventure with a tent, the right bikepacking gear and a smart packing strategy can make all the difference between a relaxed ride and a frustrating day of excess weight, rubbing bags and missing essentials.
In this guide, you’ll find a practical bike tour packing list for day rides and multi-day bikepacking trips, adapted to different bikes, routes and requirements. You’ll learn which essentials should always come with you, how to distribute your gear sensibly and what matters most when bikepacking with mountain bikes and gravel bikes. We’ll also show you what changes on multi-day tours and which extras are genuinely worth packing. You can download the complete bike tour packing list here.
Bikepacking Tips at a Glance
⚖️ Keep heavy items as low and central on the bike as possible.
⛰️ On a mountain bike, bags need to sit securely and must not interfere with suspension, tyres or freedom of movement.
🏁 On a gravel bike, gear can usually be distributed very efficiently between a frame bag, saddle bag, handlebar bag and top tube bag.
🧥 Clothing should follow the layering principle and be packed weatherproof.
🔧 Tools, spare parts, first aid kit, navigation and emergency information should always be part of your setup.
🏕️ On multi-day bikepacking tours, you may also need sleeping gear, a power bank, toiletries and extra food, depending on where you’ll be staying.
How to Pack Properly
Bikepacking is often associated with multi-day tours, frame bags and nights under the stars. But at its core, it comes down to one simple question: what do you need to take, and where can you store it so that you can ride safely, comfortably and efficiently?
That’s why a good packing strategy is worth thinking about even for longer day rides. Instead of stuffing everything into a heavy backpack, spread tools, clothing, food and emergency gear in a way that keeps important items close to hand while still allowing you to control your bike properly.
Basic Rules for Packing Your Bike
- Pack heavy items as low and central as possible.
- Keep things you’ll need regularly within easy reach: bars, phone, rain jacket if needed, multitool or map.
- Pack clothing, sleeping kit and electronics in waterproof bags.
- Nothing should swing, rattle, rub against the tyre or restrict your movement.
- Do a test ride with the bike fully loaded before your tour.
- If you’re riding in a group, share tools, pump, first aid kit and spare parts sensibly.
Bikepacking Gear: The Basics You Should Always Have With You
The basic kit for bikepacking with gravel bikes and mountain bikes is fairly similar. The main differences come down to terrain, tour length, weather, accommodation and how often you can resupply.
Bike: Your setup starts with the bike itself. Before you head out, do a quick bike check: tyres, brakes, fork if applicable, shock and suspension, bearings, cockpit, drivetrain and chain. On e-bikes, also check the battery, motor and charge level.
Protection and safety: A bike helmet is a must on every ride. Cycling gloves and glasses add protection and comfort. Knee and elbow pads are a sensible precaution on MTB tours with long or technical descents.


Navigation and emergencies: A phone with a charged offline map, a GPS device if needed, ID, first aid kit and emergency information all belong in your luggage. In remote terrain, a physical map can also be useful, especially if your battery, signal or GPS fails.
MTB or Gravel Bike: What Changes When You Pack?
Whether you ride a mountain bike or a gravel bike mainly affects which bike bags are best for carrying your gear. On a gravel bike, a frame bag, saddle bag, handlebar bag and top tube bag usually work very well, as routes tend to be less technical and the bike is ridden more steadily. On a mountain bike, freedom of movement is key: on trails, bags must not sway, hit the tyres, interfere with the suspension or dropper post, or get in the way of your body position.
Bikepacking with a Mountain Bike
On technical MTB tours, a compact cycling backpack or a well-fitting hip bag is often more practical than large bags attached to the bike. This is especially true on demanding descents, tight corners, steps or routes where you move around a lot on the bike. The more technical the ride, the lighter your backpack should be. Anything you don’t need immediate access to is often better stored low and centrally on the bike or packed carefully in your backpack on longer rides.
Important: if you use bike bags for MTB bikepacking, check in advance whether your saddle bag is compatible with your dropper post and whether your handlebar bag still has enough tyre clearance when the suspension fork is fully compressed. Bags should sit firmly and must not restrict your movement.
Bikepacking with a Gravel Bike
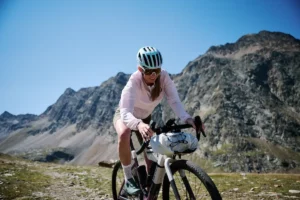
On a gravel bike, gear can usually be carried very comfortably directly on the bike. A frame bag, saddle bag, handlebar bag and top tube bag keep weight close to the bike and take pressure off your back and shoulders. Many gravel bikes also come with extra mounting points for bags or bottle cages, which makes longer bikepacking tours much easier.
For long gravel routes, a GPS device or bike computer on the handlebar is particularly practical. These routes often lead over gravel tracks, forest roads, quiet side roads and open terrain. Reliable navigation is essential.
The Right Bikepacking Bags: Distributing Weight Properly
There is no single perfect bag setup. Your bike, resupply options, accommodation, weather, group size, route choice and personal preferences all influence what makes sense. That’s exactly why it’s worth doing a trial pack and riding your loaded bike before a bigger trip. Few things are more annoying on the trail than a bag that rubs, swings or slips every time the terrain gets rough.
For Day Rides: Backpack, Hip Bag or Small Frame Bag
On day rides, you usually don’t need a full bikepacking setup. For many MTB tours, a well-fitting backpack or hip bag with a hydration bladder, tools, first aid kit, rain jacket and snacks is enough. Keep the backpack as light as possible, especially on technical terrain.
On easier MTB routes and gravel rides, a frame bag or top tube bag can be very useful. It gives you quick access to bars, phone, money, a spare shirt, tube or multitool without having to open your backpack all the time.
For Multi-Day Tours: Move the Weight onto the Bike
On multi-day bikepacking tours, packing changes significantly. Extra clothing, toiletries, chargers, sleeping gear or food all add weight and volume. At this point, it becomes especially important to distribute your kit intelligently on the bike.
For classic MTB hut-to-hut tours or an Alpencross, many riders still rely on a cycling backpack. Depending on duration, season and accommodation, suitable models are usually in the 20 to 30 litre range. If you’re travelling with a tent, sleeping bag, sleeping mat and stove, bikepacking bags become almost essential. On a gravel bike, it is usually more comfortable to carry most of the weight directly on the bike. A combination of frame bag, saddle bag, handlebar bag and top tube bag distributes gear much better than an overloaded backpack. A small hydration pack or hip bag can still make sense if you want to carry water or important small items, such as valuables, directly on your body.


Bikepacking Clothing for Day Rides and Multi-Day Tours
Bikepacking clothing needs to work while riding and, depending on the tour, also be comfortable enough for the hut, campsite or a quick stop in town. The basic principle is layering: several thin layers that you can combine depending on temperature, wind and weather.
Clothing for Day Rides
You might start in the cool of the morning and be sweating after the first climb. In the evening, especially in the mountains, it can quickly get cold again. That’s why one rule always applies: take an extra layer and check the weather forecast before you set off.
A functional base layer made from synthetic fibres or merino wool works well. Synthetic fabrics dry particularly quickly, while merino wool offers excellent temperature regulation and stays odour-free for longer. Over the top, wear a short-sleeved cycling jersey or a longsleeve. Depending on the season, a windbreaker or vest is a useful addition.
For your legs, bike shorts, long cycling pants or padded bib shorts with a liner are good options. Arm warmers and leg warmers can be useful when temperatures vary a lot. Cycling socks, gloves, a headband or neck warmer, plus sunscreen and lip balm with UV protection complete the setup.


Clothing for Multi-Day Tours
On multi-day bikepacking tours, the rule is: as little as possible, as much as necessary. You’ll feel every gram in your luggage after several hours in the saddle. You don’t necessarily need a completely fresh outfit every day: jerseys, socks or liner shorts can often be washed out in the evening and dried overnight, depending on material and conditions.
With two pairs of padded cycling shorts or liners and some extra underwear, you can usually get surprisingly far. A merino jersey can often be worn for two days without developing strong odours. That saves weight and packing volume.
In addition to your day-ride clothing, we recommend a lightweight insulated jacket for cool evenings, hut shoes or light sandals and, especially in the mountains, long casual trousers. Pack clothing in waterproof stuff sacks or drybags wherever possible. Many bikepacking bags are water-repellent, but not automatically waterproof.
Tools and Spare Parts for the Road
Even with good preparation, something can always happen on the road. A flat tyre, loose bolt or broken chain link doesn’t have to end your tour if you have the right tools with you.
Tools for Day Rides
A flat tyre is one of the most common mechanicals on long rides. That’s why a spare tube, patch kit and pump or CO2 inflator belong in your basic kit. If you ride tubeless, pack a tubeless repair kit, sealant and the right tubeless tool.
A multitool with the key Allen sizes and a chain tool is also part of the basic setup. In groups, it makes sense to split tools and spare parts so that not everyone has to carry everything twice.
- Multitool with Allen keys and chain tool
- Spare tube and patch kit or tubeless repair kit
- Bike pump or CO₂ inflator
- Tyre levers
- Cable ties for quick emergency fixes
- Quick link
- Pocket knife
- Some tape
Extra tip: especially when bikepacking with a mountain bike, a derailleur hanger can bend or break after crashes, contact with branches or rock strikes. A matching spare derailleur hanger is small, light and extremely valuable in an emergency.
Additional Tools for Multi-Day Tours
The longer the tour, the further you may be from the nearest workshop. For multi-day trips, it’s worth packing a slightly more comprehensive tool kit, adapted to the route, bike and remoteness of the terrain.
- Extra spare tubes if the route takes you far from bike shops
- Small bottle of chain lube
- Small patch or repair kit for bags and drybags
- Spare brake pads for longer tours with lots of descending
- Optional: spoke key or spare spoke for very remote trips
Food and Drink: Planning Your Nutrition Properly
Nutrition is an important part of any bike tour packing list. It often determines how relaxed you feel on the road. Too little water or too little energy quickly becomes noticeable, especially on long climbs, in hot weather or on remote routes. Plan in advance how much you’ll carry and where you can refill water or buy food along the way.
Food and Drink for Day Rides
On a long ride, you may need several litres of water depending on temperature, intensity and duration. It’s better to plan some reserve and check in advance where you can refill on the route. As a rough guide, 2.5 to 3 litres is a sensible starting point for a longer day ride. In hot weather, on long climbs or where refill options are limited, you’ll need more.
For food, pack high-calorie snacks that you tolerate well and still feel like eating when you’re tired. Nuts, dried fruit, bananas, trail mix or easy-to-digest energy bars provide quick energy. If you don’t plan to stop for food, also take something more substantial such as bread, cheese, sausage, pre-cooked pasta or potatoes.
Food and Drink for Multi-Day Tours
On multi-day bikepacking tours, your energy needs increase significantly. Your body needs enough fuel not only while riding, but also for recovery. If you’re staying in huts, you can save a lot of weight because you’ll need less cooking and food equipment.
If you’re cooking for yourself, lightweight, long-lasting foods work best: freeze-dried meals, nutrient-dense bars or a prepared muesli mix that turns into porridge with hot water. In that case, plan a small cooking kit for your bikepacking setup, including a gas stove, pot, cutlery and cup.
A water filter or purification tablets can be useful in remote terrain. They reduce risk when using suitable water sources and help you carry less drinking water. Still, check in advance whether reliable water sources are available on your route.
Additional Gear for Multi-Day Bikepacking Tours
What else you need depends heavily on whether you’ll be sleeping in huts, hotels, on campsites or outdoors.
- Sleeping: If you’re not riding from hut to hut, you may need a lightweight tent or bivy bag, a sleeping bag suited to the expected temperatures and a compact sleeping mat. Ultralight, small-packing options save space and weight. If two of you are sharing a tent, you can split the gear sensibly.
- Power and navigation: A power bank for your phone, GPS and lights is very important on multi-day tours. If you ride a lot on unfamiliar routes, a dedicated GPS device is much more reliable than relying only on your smartphone, and it also saves phone battery.
- Personal care: Chamois cream to prevent soreness, blister plasters, toothbrush and toothpaste, a small soap and a microfibre towel make a big difference after the second day in the saddle.
Bike Tour Packing List as a PDF Download
Want to quickly tick off your gear before the ride? Download our bike tour packing list as a PDF and adapt it to your route, bike and planned tour length. That way, you’ll keep a clear overview and won’t forget tools, food, clothing or important emergency equipment:
Conclusion: Ready for Your Next Bikepacking Tour
Bikepacking involves plenty of logistics, and that’s part of the fun. Testing your setup and swapping tips with other riders are key. With the right preparation, every tour becomes an adventure.
Still not sure whether your bike is ready for your next bikepacking trip? In our stores, our experts can help you with professional bike servicing, personal advice and bike fitting. That way, you start your next adventure with a properly set-up bike, more comfort and a secure feeling.