
 Login
Login
 Stores
 Cart
Cart
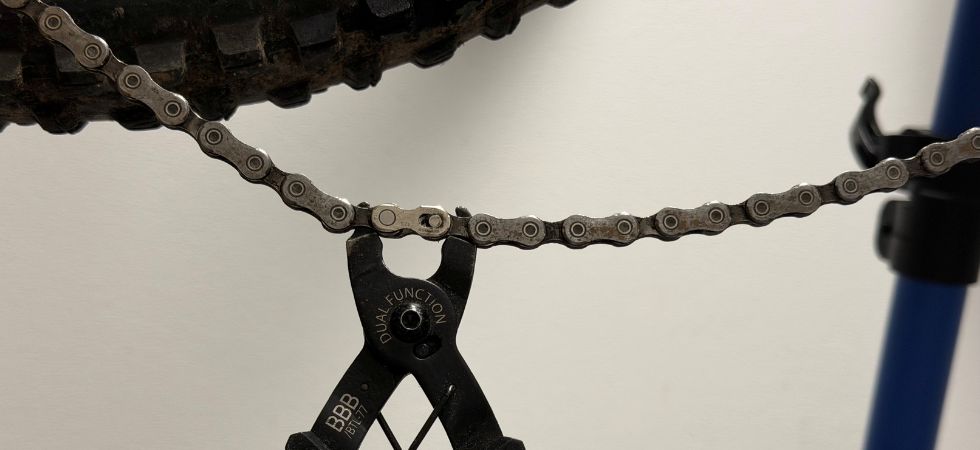
A worn chain is one of the most common reasons for poor shifting performance, increased drivetrain wear and, eventually, expensive follow-up damage. The good news is that changing a bike chain yourself is not difficult. With the right tools and a little know-how, it is quick, simple and inexpensive. This guide shows you when it is time for a new chain, which tools you need and how to fit it correctly, step by step, whether you ride a mountain bike, road bike or gravel bike.
Key Points at a Glance
🚴 A bike chain should be replaced in good time before the cassette and chainrings wear unnecessarily.
📏 A chain checker is the most reliable way to see whether your chain has already stretched.
⚙️ The new chain must match your bike’s number of gears, drivetrain and groupset.
🔧 To change a chain, you mainly need a new chain, a suitable quick link and, depending on the system, a chain tool or quick link pliers.
⛰️ On mountain bikes, dirt, mud and the correct chain length on full suspension bikes are especially important.
🏁 On road bikes and gravel bikes, the right chain, correct running direction and properly measured length matter most.
🧽 Regular cleaning and careful lubrication significantly extend the life of your chain, cassette and chainrings.
When Should You Replace a Bike Chain?
The right time to replace a chain is not always obvious at first glance. That is why it is important to check your chain regularly and understand the typical signs of wear. The following points show you what to look out for.
How Do I Know If My Chain Is Worn?
Bike chains “stretch” through wear on the pins and plates. This increases the distance between the chain links, which means the chain no longer meshes cleanly with the sprockets and chainring. A stretched chain is therefore not just a problem for the chain itself, but for the entire drivetrain.
The most reliable tool for checking whether your chain has become too long is a chain wear indicator, also known as a chain checker. It measures chain elongation. As a rule of thumb, modern 11 and 12 speed drivetrains usually need a new chain from around 0.5 percent wear. On many 8, 9 or 10 speed drivetrains, the limit is often closer to 0.75 percent. By 1.0 percent at the latest, the chain is clearly worn and may already have caused significant wear to the cassette and chainrings. A chain checker shows you how much your chain has already stretched in percentage terms.
Are There Visible Signs Too?
Yes, although they usually appear later than a measuring tool would indicate. If the chain skips when shifting or slips over the teeth under load, it is very likely already too long. The same applies if you can pull the chain forward by hand at the chainring and the teeth become clearly visible. At that point, it is definitely time for a new chain.
Which Tools Do I Need?
The effort involved is fairly manageable. To replace a bike chain, you essentially need:
- Chain tool for shortening the new chain and opening old chains without a quick link.
- Chain wear indicator to check whether the chain really needs replacing.
- Quick link.
- New chain.
- Quick link pliers.
- Cloth and chain cleaner for a clean working area.
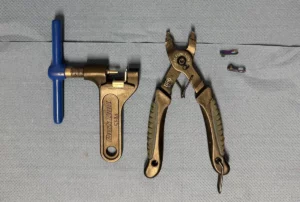
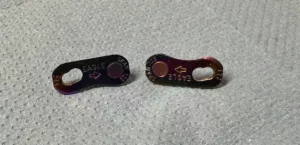
Many modern chains come with a quick link. Depending on the manufacturer and model, however, a special connecting pin or manufacturer specific joining system may be required. A quick link makes installation much easier and often means you do not need a chain tool to close the chain. To open the old chain, however, a chain tool is still the safest option if no quick link, such as Shimano Quick Link, is fitted.
How to Change a Bike Chain: Step by Step
Before you start, keep this important note in mind: chains differ depending on manufacturer, number of gears and groupset. Always follow the installation instructions from the relevant manufacturer, especially for 12 speed drivetrains, directional chains, special quick links and full suspension mountain bikes.
How Do I Change a Bike Chain?
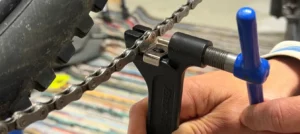
Step 1: Open the old chain. If a quick link is fitted, press the two halves together and pull them apart. Without a quick link, use a chain tool to push out a pin and open the old chain. Important: On modern chains, a pushed-out pin should not be reused. Depending on the chain, you will need a suitable quick link or the correct connecting pin to close it again.
Step 2: Remove the old chain and check the drivetrain. Now is a good time to take a quick look at the cassette and chainrings. If the teeth are already clearly hook shaped or asymmetrically worn, you should replace these parts too. A new chain on worn sprockets will skip and never run smoothly.
Step 3: Shorten the new chain to the correct length. If the old chain was cut to the correct length, you can use the same number of links. However, it is safer to determine the length again. Place the chain over the largest chainring and largest sprocket without routing it through the rear derailleur, then add the number of links specified by the manufacturer. This requirement differs depending on the derailleur, drivetrain and joining system.
Step 4: Route the chain. Guide the chain correctly through the rear derailleur and around both jockey wheels. Make sure it runs on the correct side of the guide tab or safety tab in the derailleur cage. Also pay attention to the running direction. Many chains have a prescribed direction of travel, indicated by an arrow or lettering on the outer plates.
Step 5: Close the chain. 1. With a quick link: Insert one half of the quick link into the chain. Pay attention to the arrows showing the correct direction. Insert the second half of the quick link into the other end of the chain in the opposite orientation. Then hook the two halves together. Position the quick link on the upper run of the chain between the cassette and chainring. Hold the rear brake and carefully apply pressure to the crank until the quick link clicks or locks into place. Alternatively, you can use quick link pliers. Afterwards, check that both halves are fully engaged. 2. Closing the chain with a connecting pin: If your chain is closed with a connecting pin, only use the correct pin from the manufacturer. Press it in with the chain tool until it sits correctly, then break off the protruding guide section.
Step 6: Check the function. Turn the crank by hand and shift through all gears. If the chain skips or runs roughly, first check whether it is routed correctly through the rear derailleur, whether the quick link is fully engaged and whether any chain link is stiff. If the new chain skips under load on individual sprockets, the cassette may already be worn.
Special Features by Bike Type
Depending on the type of bike, the requirements when changing a chain can vary considerably. The intended use, drivetrain type and frame design are especially important. That is why it is worth checking not only the number of gears, but also the specific features of your bike.
Changing a MTB Chain
On a mountain bike, the chain is exposed to tougher conditions than on any other type of bike. Dirt, sand, mud and rock strikes quickly attack the material. Regular cleaning is therefore not a luxury, but essential. When replacing an MTB chain, another key rule applies: always buy a chain that exactly matches the drivetrain and number of gears. A 12 speed chain on an 11 speed cassette is not an option. On full suspension bikes, chain length is especially important. As the suspension compresses, the distance between the bottom bracket and rear axle can change. If the mountain bike chain is too short, the rear derailleur or drivetrain can be damaged. For full suspension bikes, always follow the manufacturer’s specifications.
MTB extra tip: Clean and relubricate the chain after every muddy ride. This greatly extends its lifespan and saves far more money in the long run than a cheap lubricant costs.


Changing a Gravel Bike or Road Bike Chain
Gravel bikes and road bikes are often similar when it comes to changing a chain, but they are not always identical. Classic road bikes often use 2x drivetrains with closely spaced cassettes, while gravel bikes often have larger cassettes or 1x drivetrains. The chain must therefore match not only the number of gears, but also the groupset and cassette size. Unlike a full suspension mountain bike, the chain length on road and gravel bikes usually does not change while riding due to rear suspension movement. This makes correct chain length, correct running direction and a suitable quick link all the more important.


Tips for Chain Care and Lifespan
With the right care, you do not have to replace your bike chain constantly. It is not about a huge amount of effort, but about a few simple habits that keep the drivetrain cleaner, quieter and longer lasting. Especially after rides in bad weather, it is worth taking a quick look at the chain.
How Do I Keep My New Chain in Good Condition for as Long as Possible?
The most important measure is also the simplest: clean it regularly and lubricate it properly. A chain that runs dry and covered in dirt wears much faster than a well-maintained one. After wet or dirty rides, always clean the chain, let it dry and only then apply lubricant. If you do it the other way around and oil a dirty chain, you only bind more dirt into the links.
Too much lubricant is also a problem. Excess oil attracts dirt and speeds up wear. A thin, even application on the inner plates is completely sufficient. A useful rule: riding two chains in rotation can significantly extend the total lifespan of both chains and the cassette. This is a smart trick that is especially interesting for frequent commuters and touring cyclists.
Conclusion: Changing Your Bike Chain Early Is Always Worth It
Fitting a new bike chain in good time is one of the cheapest maintenance jobs on a bike, and also one of the most effective. If you wait until the drivetrain has already suffered, you may end up paying many times more for new sprockets or a new chainring. With a chain checker, a little practice and the right components, the job can be done in around 30 minutes.
Want to take better care of your chain? In our bike care products category, you will find chain oil and cleaning brushes.