
 Login
Login
 Stores
 Cart
Cart

Too much pressure or too little, and your ride quickly stops being fun. The right tyre pressure is one of the simplest and most effective ways to fine-tune your bike. It affects grip, comfort, puncture protection and rolling resistance. The best part: it costs nothing to optimise.
This bike tyre pressure guide explains what matters for road bikes, gravel bikes and mountain bikes, which values you can use as a starting point and how to find the right pressure for your setup step by step. All you need is a good pump with a pressure gauge and a feel for your bike.
THE KEY POINTS AT A GLANCE
🚴 The right bike tyre pressure improves grip, comfort, puncture protection and rolling resistance.
⚖️ Rider weight, tyre width, terrain and riding style all influence the ideal pressure.
🏁 On a road bike, the right tyre pressure helps you roll efficiently and handle confidently on tarmac.
🌲 On a gravel bike, tyre pressure should be adjusted flexibly to suit changing surfaces.
⛰️ On a mountain bike, tyre pressure has a major impact on traction, control and puncture protection.
🔧 Tubeless tyres can usually be run at lower pressures than tyres with inner tubes.
📏 The values printed on the tyre sidewall are important limits, but they do not replace fine-tuning your own setup.
HOW TO FIND THE PERFECT TYRE PRESSURE FOR YOUR ROAD BIKE
On a road bike, almost everything operates close to the limit: narrow tyres, high speeds and smooth tarmac. The wrong tyre pressure does not just cost you speed, it can also affect ride feel and safety. If the pressure is too high, the bike bounces more over uneven surfaces and loses traction more easily. If the pressure is too low, the risk of punctures increases and steering can feel sluggish. The right pressure gives you the best balance of efficiency, comfort and control.
What is the right tyre pressure for a road bike?
The most important factor is rider weight. This does not just mean your body weight, but also the weight of the bike, clothing, bottles and any other gear. The higher the total system weight, the more pressure the tyre needs. Tyre width and rim width are also important. As a general rule, narrower tyres need more pressure than wider tyres. The type of tyre matters too. Clincher tyres, folding tyres, tubular tyres and tubeless tyres all behave differently.
With tubeless tyres, meaning tyres without an inner tube, you can usually run around 0.5 to 1 bar less pressure. This improves comfort and grip, especially on rougher tarmac. Tubular tyres are now mainly used in performance and racing settings. A good first step is always to check the tyre sidewall. There you will find the minimum and maximum values specified by the manufacturer. You should never exceed these limits. From there, you can adjust the pressure to suit your weight, setup and preferred ride feel.
As a rough guide, road bike tyre pressure often sits somewhere between just under 4 bar and around 8 bar. Wider modern road bike tyres are often run at lower pressures than very narrow tyres. It is best to work your way towards the right value gradually and adjust the pressure in small steps. The rear wheel carries more weight than the front wheel, so it usually makes sense to run slightly more pressure at the back. As a guideline, you can use around 0.2 to 0.5 bar more in the rear tyre than in the front.
Tubeless or inner tube: does it make a difference?
Yes, the difference is noticeable. Tubeless tyres can be run at lower pressures because there is no inner tube that can get pinched. This reduces the risk of classic pinch flats. At the same time, comfort improves because the tyre can adapt better to small bumps and imperfections in the road. On rough tarmac, cobblestones or longer rides, a tubeless setup can therefore feel especially comfortable. If you ride with inner tubes, you should choose a slightly higher pressure to help avoid punctures.
What should you do on changing surfaces or in bad weather?
On wet roads, rough tarmac or cobblestones, it is worth lowering the pressure slightly. The tyre can then deform more, the contact patch becomes larger and grip improves. Just make sure you do not let out too much air. If the tyre feels vague or the bike starts to handle imprecisely in corners, the pressure is too low.
How often should you check road bike tyre pressure?
Road bike tyres regularly lose air because of their thin tubes and high pressures. Before every longer ride, it is worth doing a quick check with your pump. The advantage with a road bike is that once you have found your ideal pressure, you usually do not need to change it dramatically very often. The terrain and setup tend to stay fairly consistent. Gravel bikes are a different story, as the surface changes much more frequently.
Looking for a fast bike for tarmac, training rides and long days in the saddle? Discover our road bikes and find the right model for your riding style:


HOW TO FIND THE PERFECT TYRE PRESSURE FOR YOUR GRAVEL BIKE
A gravel bike is a true all-rounder. One moment you are rolling along tarmac, the next you are riding over gravel, forest tracks or muddy sections. That is exactly why finding the right tyre pressure for a gravel bike is so important. The perfect pressure depends more on the surface than it does with many other types of bike. On tarmac, the tyres can be a little firmer. On loose gravel or wet ground, lower pressure gives you more traction and control.
Here too, the best place to start is with the manufacturer’s recommendations on the tyre sidewall. Lighter riders should stay closer to the lower end of the range, while heavier riders should start closer to the upper end.
What is the right tyre pressure for a gravel bike?
On a gravel bike, tyre width, rider weight and terrain all work closely together. Wider tyres can be run at lower pressures because they offer more volume. Loose or soft ground also calls for lower pressure than firm tarmac.
For 35 mm tyres, you can use the following values as a rough guide:
If you weigh under 64 kg, around 2.4 to 2.8 bar works well on firm ground. On loose gravel, around 2.1 to 2.4 bar is a good range. In mud or sand, you can start at around 1.9 to 2.2 bar.
If you weigh between 64 and 82 kg, suitable values are around 2.8 to 3.1 bar on firm ground, 2.4 to 2.8 bar on loose gravel and 2.2 to 2.4 bar in mud or sand.
If you weigh more than 82 kg, around 3.1 to 3.4 bar is a good starting point on firm ground. On loose gravel, around 2.8 to 3.1 bar works well, while mud or sand usually calls for around 2.4 to 2.6 bar.
For 40 mm tyres, you can run slightly lower pressures:
If you weigh under 64 kg, around 2.1 to 2.4 bar is a good range on firm ground. On loose gravel, around 1.9 to 2.2 bar works well. In mud or sand, aim for around 1.7 to 2.1 bar.
If you weigh between 64 and 82 kg, you can start with around 2.4 to 2.8 bar on firm ground. On loose gravel, around 2.1 to 2.4 bar is suitable, while mud or sand usually calls for around 1.9 to 2.2 bar.
If you weigh more than 82 kg, good starting values are around 2.8 to 3.1 bar on firm ground, 2.4 to 2.8 bar on loose gravel and 2.1 to 2.4 bar in mud or sand.
For 45 mm tyres, the pressure drops a little further:
If you weigh under 64 kg, around 1.9 to 2.2 bar works well on firm ground. On loose gravel, around 1.7 to 2.1 bar is suitable. In mud or sand, you can start at around 1.5 to 1.9 bar.
If you weigh between 64 and 82 kg, around 2.2 to 2.4 bar is a good guide on firm ground. On loose gravel, around 1.9 to 2.2 bar works well, while mud or sand usually calls for around 1.7 to 2.1 bar.
If you weigh more than 82 kg, around 2.4 to 2.8 bar is a sensible range on firm ground. On loose gravel, around 2.1 to 2.4 bar is suitable. In mud or sand, aim for around 1.9 to 2.2 bar.
For 50 mm tyres, you can run particularly low pressures:
If you weigh under 64 kg, around 1.7 to 2.1 bar is a good starting point on firm ground. On loose gravel, around 1.5 to 1.9 bar works well. In mud or sand, around 1.4 to 1.7 bar is a useful guide.
If you weigh between 64 and 82 kg, suitable values are around 1.9 to 2.2 bar on firm ground. On loose gravel, around 1.7 to 2.1 bar is a good range, while mud or sand usually calls for around 1.5 to 1.9 bar.
If you weigh more than 82 kg, you can start with around 2.1 to 2.4 bar on firm ground. On loose gravel, around 1.9 to 2.2 bar is suitable. In mud or sand, around 1.7 to 2.1 bar works well.
These values are guidelines. The perfect tyre pressure also depends on your riding style, rim width, tyre model and the actual surface you are riding on.
Tubeless or inner tube: what is best for a gravel bike?
Tubeless is especially recommended for gravel bikes. Gravel sections with sharp stones are a common cause of punctures. With a tubeless setup and sealant, many small cuts can seal automatically. Another advantage: tubeless lets you ride with lower pressure. On loose surfaces, this gives you more traction, more comfort and a more secure ride feel. If you often ride away from paved roads, you will notice the benefit clearly.
When should you adjust gravel bike tyre pressure?
Ideally, you should check your tyre pressure before every ride. This becomes especially important when the terrain changes. If you start on tarmac and later move onto gravel, forest tracks or muddy sections, it can make sense to let out a little air during the ride. That is why many experienced gravel riders carry a small pump with them. It allows you to adjust the pressure flexibly on longer rides.
Which rim and tyre combination suits the right pressure?
Rim width affects how wide a tyre actually measures once mounted. A wide tyre can sit even wider on a wider rim, which also changes the ideal tyre pressure. With hookless rims in particular, you should strictly follow the manufacturer’s recommendations. Some hookless rims have a fixed pressure limit that must not be exceeded. Always check the specifications from both the tyre and rim manufacturer.
Want the freedom to switch between tarmac, gravel and forest tracks? Discover our gravel bikes and find your bike for versatile adventures:


HOW TO FIND THE PERFECT TYRE PRESSURE FOR YOUR MOUNTAIN BIKE
No other type of bike reacts as strongly to tyre pressure as a mountain bike. Trails, roots, rocks and wet soil constantly put your tyres to the test. If the pressure is too high, the tyre tends to bounce over obstacles instead of rolling smoothly over them. The rear wheel can break traction more easily and comfort suffers. If the pressure is too low, the tyre can bottom out on the rim during hard impacts. This increases the risk of punctures and rim damage. The right MTB tyre pressure gives you grip, control, cushioning and puncture protection.
What is the right tyre pressure for a mountain bike?
There are many factors that influence MTB tyre pressure. These include the type of mountain bike, tyre width, casing, riding style, terrain, rider weight and whether you ride with inner tubes or tubeless. As a starting point, many experienced mountain bikers recommend beginning with slightly higher pressure and then working your way down gradually. Lower the pressure in small steps of around 0.1 bar. Even small changes are clearly noticeable on the trail.
- For cross-country and marathon riding with inner tubes, you can use around 2.0 to 2.5 bar at the front and 2.2 to 2.5 bar at the rear as a rough guide.
- For cross-country and marathon riding with a tubeless setup, sensible starting values are around 1.7 to 2.2 bar at the front and 1.9 to 2.4 bar at the rear.
- For trail and enduro riding with a tubeless setup, you can start at around 1.0 to 1.9 bar at the front and 1.1 to 2.0 bar at the rear, depending on your weight, tyres and route.
As a general rule, the front tyre should be run at slightly lower pressure than the rear tyre, as it carries less weight. This improves grip and steering precision. A useful practical test is to sit on the bike with your full body weight and look at the tyres from the side. They should visibly deform, but not fold or collapse.
Tubeless or inner tube: what makes sense for MTB?
In trail and enduro riding, tubeless is often the preferred choice today. The benefits are clear: you can run lower pressures, small cuts are often sealed automatically by sealant and the bike feels more agile. For occasional rides on relaxed trails, inner tubes are still an affordable and low-maintenance option. In that case, tyre pressure should be slightly higher to help prevent pinch flats.
What else affects MTB tyre pressure?
Alongside weight and tyre type, several other factors play a role. A robust casing often allows you to run slightly lower pressure because the tyre is better supported. A wider rim gives the tyre more sidewall stability and can also make lower pressures possible.
The bike’s suspension also matters. It helps absorb impacts, but it does not replace properly adjusted tyre pressure. On e-MTBs, the higher overall weight is another factor. That means e-MTBs usually need slightly more pressure than non-assisted mountain bikes. For specific uses such as downhill or enduro racing, tyre inserts are often used as well. They help protect the rim and tyre and allow lower pressures under heavy loads.
How do I know if my MTB tyre pressure is right?
The best test is the trail itself. If the tyre bounces over roots and rocks instead of gripping the ground, it is probably too hard. If the bike feels vague in corners or you hear a clear impact sound from the rim when landing, the pressure is too low. It is worth noting down the values that work well on your favourite trail. That way, you can reproduce a good setup at any time and adjust it when needed for weather, terrain or extra load.
Ready for more grip, control and fun on the trail? Discover our mountain bikes and find the right bike for your next off-road adventure:


GENERAL TIPS FOR BIKE TYRE PRESSURE
Beyond the differences between road bikes, gravel bikes and mountain bikes, there are a few basic rules that apply to every type of bike. If you check your tyre pressure regularly and understand the key factors that influence it, you can noticeably improve comfort, safety and puncture protection. The following tips will help you assess and adjust your bike tyre pressure correctly.
How do I measure tyre pressure correctly?
Most floor pumps show the tyre pressure directly on the built-in gauge. For everyday use, this is usually accurate enough. If you want a more precise reading, you can also use a separate tyre pressure gauge. This is especially useful for mountain biking, where small differences of 0.1 to 0.2 bar can already be clearly noticeable at low pressures.
Why do bike tyres lose air?
Bike tyres gradually lose air over time, even if there is no visible puncture. Air diffuses through the tyre material and the inner tube. This happens faster with latex tubes than with butyl tubes. Tubeless tyres also lose air gradually. Fresh sealant helps keep the tyre reliably sealed, but after a few months the sealant can dry out, which may increase air loss. The most important rule is therefore: quickly check your pressure before every ride.
Does temperature make a difference to tyre pressure?
Yes, temperature affects tyre pressure. Cold air has lower pressure than warm air. With a temperature difference of 20 degrees Celsius, bike tyres can lose around ten percent of their pressure. A tyre inflated to 2.0 bar in warm conditions can therefore have noticeably less pressure in much colder weather. On cold days, it is worth checking the pressure again once the tyre has cooled down and adjusting it slightly if needed.
What do the numbers on the tyre mean?
Every tyre has either a pressure range or a maximum pressure printed on it. This value must not be exceeded, but it is not automatically the ideal riding pressure. The optimal tyre pressure is often significantly lower, depending on body weight, terrain, riding style, tyre width and setup. Use the manufacturer’s information as a safe limit, then fine-tune your pressure until you find your personal ideal value.
Which valve type is right?
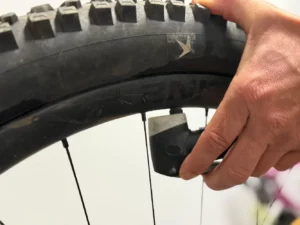
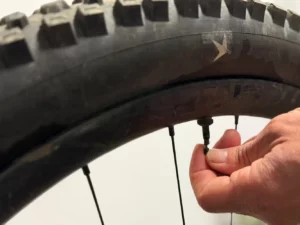
Presta valves are very common on road bikes, gravel bikes and many mountain bikes. These are the long, narrow valves. Schrader valves are the same type used on cars. They are more common on entry-level mountain bikes and city bikes. When buying a pump, make sure the pump head fits your valve type. Many modern pumps already come with adapters or dual heads for both valve types.
CONCLUSION: THE RIGHT TYRE PRESSURE MAKES A NOTICEABLE DIFFERENCE TO YOUR BIKE
When it comes to bike tyre pressure, there is no single perfect value for everyone. The ideal pressure always depends on your bike, your weight, your tyres, the terrain and your riding style. On a road bike, the focus is usually on balancing speed, comfort and safety. On a gravel bike, tyre pressure needs to adapt flexibly to changing surfaces. On a mountain bike, the right pressure is key to grip, control and puncture protection on the trail.
Always start with the manufacturer’s recommendations printed on the tyre, use the guideline values as a starting point and adjust the pressure step by step. Once you have found your ideal tyre pressure, your bike will feel more efficient, safer and noticeably more comfortable to ride. Still looking for the right bike for your next rides? Discover our selection of road bikes, gravel bikes and mountain bikes and find the bike that suits your riding style.