
 Login
Login
 Stores
 Cart
Cart
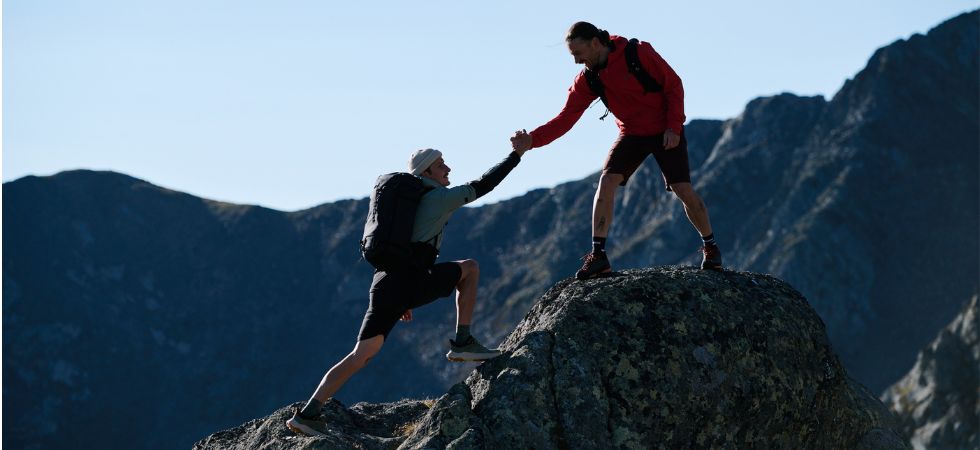
The transition from hiking to mountaineering is usually gradual: trails become narrower and more exposed, short climbing sections appear, and the demands on your gear and planning increase. Here you will find out which equipment you really need to get started, how to plan your first mountain tour and what to keep in mind when it comes to safety.
The key points at a glance
- 🥾 For easy mountain tours, sturdy category B or B/C mountain boots are often sufficient.
- 🎒 For easy mountain tours, this additional gear is usually enough: a well-fitting backpack, weatherproof layered clothing, trekking poles, enough water and food, plus a first-aid kit, mobile phone and map or GPS.
- 🌦️ Weather, elevation gain and difficulty should always match your ability.
- 🧭 Plan your tour with a mountain weather forecast, time buffers, a map or GPS.
- 🧗 Fitness, sure-footedness and concentration are essential in the mountains.
- 🤝 For your first tours, experienced companions, courses or a mountain guide are a good idea.
Hillwalking, mountaineering or high-altitude mountaineering
Mountaineering is highly varied: you move along narrow, sometimes unmaintained paths where you may need to use your hands for support in short sections. This can range from demanding hillwalking with brief scrambling passages to easy via ferratas. Depending on the route, you may need additional gear such as a helmet, via ferrata set or safety equipment.
When the terrain and requirements become even more alpine, for example with glacier travel, technical passages or moving as a roped team, you are entering the realm of high-altitude mountaineering.
Your first mountaineering gear as a beginner
Mountaineering gear builds on classic hiking equipment, but goes a clear step further in some areas. How much you ultimately pack depends heavily on the tour you choose: distance, elevation gain, terrain and season determine whether a simple hiking backpack is enough or whether a helmet and climbing harness need to come along, which also makes a more functional backpack useful.
Mountaineering boots
For easy mountain tours, sturdy category B or B/C mountain boots are often sufficient, depending on the terrain. If the trails become steeper, rockier or include scree, short climbing sections or snowfields, a more supportive category B/C or C boot makes sense. For steeper firn or ice passages, you need crampon-compatible boots, matching crampons and the right technique.


The right backpack
For many day tours with little extra gear, 20 to 25 litres are enough. If you are planning longer tours, for example with an overnight stay in a mountain hut, or if the weather is changeable, 30 to 35 litres are often the better choice. Look for a padded hip belt that takes weight off your shoulders, as well as attachment options for poles and a helmet.
You can find an up-to-date market overview of the best hiking backpacks here. We also stock climbing backpacks with specific features.


Clothing for mountaineering
When your level of effort changes frequently and the weather can turn quickly, layered clothing pays off because you can flexibly add or remove layers on the go. Next to your skin, wear breathable functional underwear, then add a fleece or light insulated jacket for breaks and a windproof and waterproof jacket against rain, snow and wind. A hat, neck warmer and gloves belong in your pack: there can be major temperature differences between the valley and the summit, and wind makes it feel even colder.
Trekking poles: useful companions for mountaineers
Hiking and trekking poles reduce strain on your knees, especially on descents, and give you extra stability on loose ground, particularly on longer tours or with a heavier pack. For short climbing sections, simply attach them to your backpack so that both hands are free. Telescopic poles are the more practical choice here because they can be shortened and stowed quickly.


Safety and emergency gear in the mountains
A well-stocked first-aid kit belongs in every mountaineering backpack, supplemented by blister plasters for your feet. Also check whether your kit includes an emergency blanket. On longer or more alpine tours, a lightweight bivy bag is also useful in case you have to stop for longer due to injury, weather or darkness. For navigation, you can rely on digital maps and GPS. A physical map is still a useful addition, especially for getting an overview during planning or in case your technology fails or the battery runs out.
You do not need a helmet on every mountain tour, but as soon as the rock is loose, the route is heavily frequented or cable-secured sections are part of the tour, it belongs in your pack. Whether this applies to your tour is usually already stated in the route description.
If your route leads over a via ferrata or longer cable-secured passages, you will need a suitable climbing harness and via ferrata set in addition to your normal mountaineering gear and helmet. How demanding a secured passage actually is can vary greatly. This is also something you can check in the route description beforehand.
Food and drink for mountaineering
Of course, mountaineering uses plenty of energy too. Pack enough lunch, fruit, nuts and bars. You should not skimp on water either: take at least one fully filled hydration bladder or one to two drinking bottles. A look at the route description will also show you whether there are places to stop for food or refill water along the way.
| Basic hillwalking gear | Extension for mountaineering |
| Category A/B hiking shoes | Category B/C mountain boots with a stiffer sole |
| Hiking backpack | Backpack with attachment options for poles and helmet |
| Rain jacket, fleece pullover or jacket, spare socks | In addition: softshell jacket, hat, finger gloves |
| Trekking poles | Trekking poles, possibly with larger baskets for snow or soft ground |
| First-aid kit, mobile phone, map | In addition: bivy bag, helmet and, depending on conditions, microspikes or crampons |
| Water/tea and enough food | – |
How to plan your first mountain tour
Thorough tour planning plays a major role in whether your first mountain tour will be a success. As a rough guideline, you can calculate with around 300 metres of elevation gain per hour on the ascent and 500 metres of elevation loss per hour on the descent. You also need to factor in the distance, difficult sections, breaks and the slowest person in the group. These reference values help you estimate walking time realistically and get back before nightfall.
Just as important is how exposed the passages are and whether there are climbing sections that match your current ability. Pay attention to which grading system is used for your tour in the first place: tour platforms, guidebooks and trail signs use different systems, from the three-colour classification of easy, moderate and difficult to alpine hiking scales and climbing grades for individual passages. Look at what each level specifically requires in terms of sure-footedness and a head for heights instead of relying only on a colour or number.
The weather forecast is also part of the essential preparation: use a dedicated mountain weather forecast and compare it with one or two additional sources. Do not only look at rain, but also at the risk of thunderstorms, wind, temperature drops, visibility and the snow line. Especially in high mountain terrain, conditions can change within a short time. Slope aspect is also interesting here, meaning the direction the slope you are climbing faces. This tells you whether your route is more shaded or exposed to the sun.
In the end, always choose your tour so that even the least experienced person in your group can manage it well.
Building fitness and sure-footedness
Even easy mountain tours can involve several hundred metres of elevation gain, while more demanding tours quickly add up to over a thousand metres of ascent and descent. For this, you need a solid basic level of fitness. If you run or cycle regularly, getting into mountaineering will be easier for you than for someone who is untrained. As effort increases, concentration drops, and that can quickly become a risk in exposed terrain.
Just as important as fitness is sure-footedness: how confidently you move on uneven, sometimes slippery ground and how well you assess your next step. Balance exercises, regular hiking on varied terrain and occasional indoor climbing train exactly that. Good body awareness also gives you the mental confidence you need in exposed terrain.
Safety on the mountain
Weather changes, rockfall and an unplanned stop where you start to cool down are among the situations that most often become dangerous when mountaineering. The most important safety decision is the one you make along the way when you turn back in critical situations: if thunderclouds build, the terrain becomes more difficult than expected or you are running out of time, returning is often the right choice. The summit will still be there, and you can repeat the tour in better conditions.
If you do get into an emergency, the free “SOS EU ALP” app can help, for example. In Bavaria, Tyrol and South Tyrol, it allows you to make an emergency call quickly and easily. Your location data (GPS coordinates) and contact details (direct phone number) are automatically transmitted to the relevant rescue control centre. Regardless of this, you should know the valid emergency number for the region you are touring in. Within the EU, this is 112.
The best way to start: with experience by your side
For your first mountain tours, it is worth joining experienced people instead of setting off alone straight away. Alpine clubs and mountain schools offer courses where you can learn walking technique, gear handling and risk assessment under guidance. Alternatively, a certified mountain guide can accompany you individually and adapt the tour to your ability, which gives you a lot of extra safety, especially when you are just starting out.
Conclusion: mountaineering gear for beginners
Mountaineering is the next step when classic hiking trails are no longer enough for you and you want to move more confidently in alpine terrain. That is exactly why you should approach the start consciously: with a realistic choice of tour, the right gear and an honest view of your own ability. Not every mountain tour immediately requires a climbing harness, helmet or crampons, but you should know when each piece of equipment becomes necessary.
For beginners, the rule is: start with an easier tour, gain experience and build up step by step. The better you can assess the terrain, weather, your gear and your own fitness, the more relaxed and safe you will feel in the mountains. And that is what mountaineering is all about: not just reaching the summit, but enjoying a safe, conscious and intense day in the mountains.