
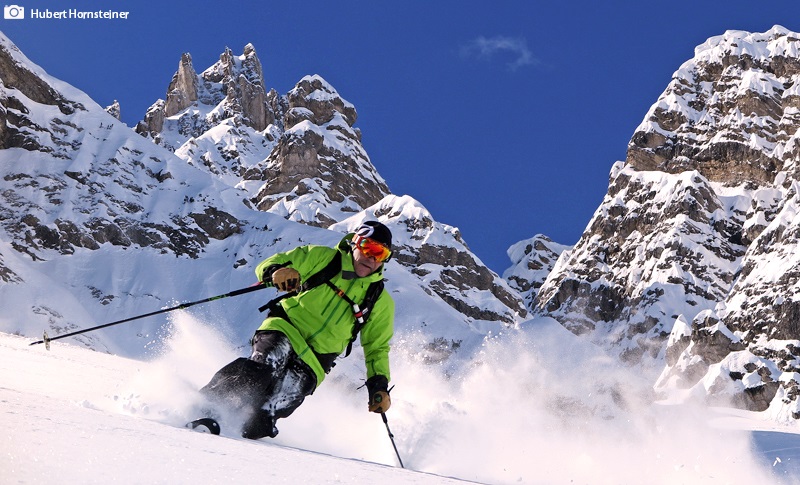
Bright blue sky, fresh powder and untouched ski slopes or snow faces. With every turn your knees touch the ski. With every move, you are sinking into a fresh powder snow. At the end of the ride, both legs are tired and thighs are burning, but the reward comes in terms of the best satisfaction, a big smile from one ear to another and the feeling of freedom which telemarking provides.
The following expects you in this blog:
TELEMARK – WHAT IS IT About?
Almost everyone has already seen such a skier on the slope or offpiste, perhaps you already caught yourself looking after these skiiers and their strange looking technique. This was a telemark skier. They have a very unique technique and way of riding down the slope. Every turn they make is done with a sidestep and a movement of the knee down to the ski. Mainly because of this movement, they are easily recognizable. Telemark is one of the oldest and probably one of the purest ski technique, which has been evolving since it’s very beginning. In this article, we would like to inform you about the newest trends and products on the market so you can learn more about this skiing technique from Norway.
what is the right Telemark-Technique?
Telemarking excels mainly due to the fact, that similar to cross-country skiing, the binding is not fixed. A special technique makes it possible, that the shoe is only on its forefront fixed to the binding. On piste, you can easily recognize a Telemarker, as the style differs from alpine skiing: the inside ski is going to set backward with a smooth movement of the unfixed heel. During this move, only the forefront of the shoe should remain in the binding. Experts call this movement the Freeheel-Position. Before ever testing free-heel skiing on the slope, it makes sense to practice it first at home. To do so, you place yourself over the skis and put one leg forward and the other one backward. The body’s center should be placed above the middle of the skis. With a jump, you then can change the forefoot to come into the knee bend. If you hold a pole with both of your stretched arms above your head during this exercise, you can gain more stability.
After practicing at home, you can start telemarking on a very flat ski slope. As a first exercise, you can try crossing the slope in a bended knee position. And back with the other leg in exactly this telemarking-position. Once you can handle that, you can try to do some small curves. Be careful and try not to overtwist the curves. For safety reasons please keep in mind, that while crossing a ski slope the slope should be almost empty.
what TELEMARK EQUIPMENT do you need?
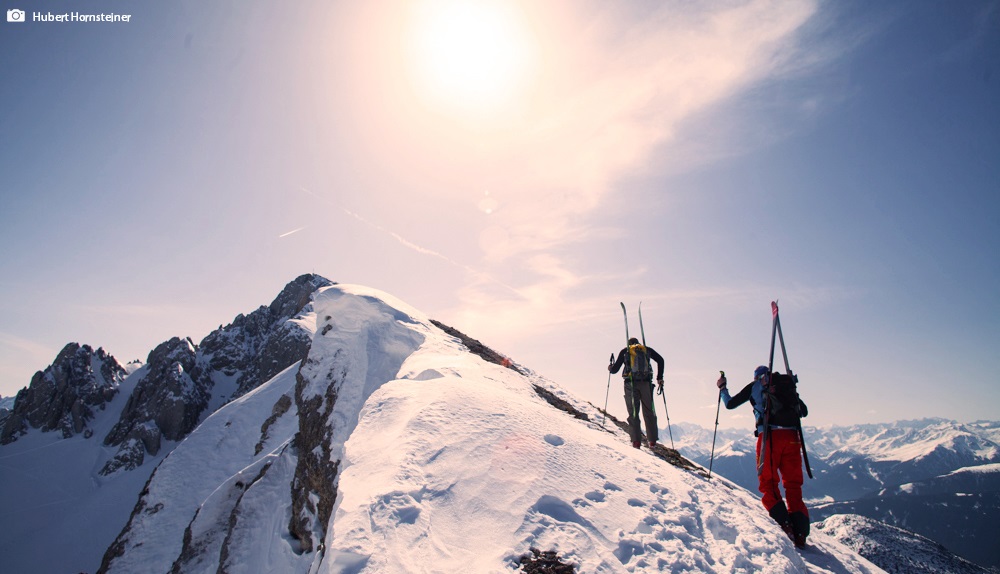
As in other ski disciplines, telemark also contains basic equipment such as telemark boots, special bindings, and proper skis. Additionally, for a ride out of slope, it is recommended to have similar equipment for ski touring such as climbing skins, avalanche safety equipment, and other accessories.
There is a right gear for every individual and skier type. Nowadays, there are two popular types of binding. Either there is a classical 75mm-binding with the well-known beak on the shoe or NewTelemarkNorm binding, shortly named NTN. Both options are made out of the newest material, which offers further opportunities and the best telemark experience. Telemark offers a variety of possibilities from ski touring, telemark as well as alpine skiing.
Similar to the alpine or ski touring binding, the telemark binding is classified according to weight classes, and for every ski style and taste, there is a possibility to find the optimal product. The 75mm- is a known and old-fashioned binding and boot type, which almost everyone has learned to recognize or at least has asked why there is a “beak”. In terms of bindings, there is a great variety of offers. The NTN boots are without any “beak” and therefore are easy to differentiate from the 75mm- type.
What are the DIFFERENT TELEMARK SKIING TYPES?
The preferred skis are dependent on the terrain that the skier chooses such as a normal ski slope, backcountry or just an overall area. Additionally, someone can also prefer to have the opportunity to go ski touring with telemark equipment.
Allround use – a bit from everything
In the allround set, the goal is to have a pair of skis and boots that cover all areas of application but also provide a possibility to do a telemark ski tour. For that reason a person should choose between medium width from 90 to 105mm and similarly to the width, also the weight should be distributed in the middle segment of the ski. If you are planning to do tours, it is good to remember that a low weight ski is rather for ascent whereas a higher weight is preferably for downhill. Furthermore, the binding can be 75mm- or NTN-variant, which allows a person to do both telemarking and ski touring. In basics, it is recommended to ride in the alpine skiing areas, where it is safe.
The freerider – the wider, the better
In the freeride areas, the rule for telemark skiing is the same as for alpine skiing: the wider the skis, the better uplift of the ski in the fresh powder. The one with a rocker (some also at the end of the ski) is providing an easier possibility to start a turn and a smoother movement in deep snow. Freeriders should choose skis with the right shape, but they don’t have to pay too much attention to the weight. The binding, on the other hand, has to be stable and solid and should be primarily designed for telemarking. As mentioned before, weight is not a primary factor in the case of freeride skies.
Learn more about Rocker Types: → Flat, Camber, Tail und Tip: Which Rocker is the right for me?
The ski touring freeheel skier – light and still for telemarking
A lot of skiers want to combine ski touring and telemarking. In order to enjoy both ascent and also descent, one has to get back to → touring skis, which are light on the ascent but stable enough on the downhill at the same time. As a result, skis should not be lighter than 1500 grams. The width of the ski depends on the area of the suspected application, either ski slope or backcountry. If you would prefer to go on the ski slope then skis should have a middle width between 90 – 105mm. The binding should be made for ski touring. If you would like to save some weight, then there is a possibility of telemark pin-bindings.
Key facts
Length of skis
Skis for allround use or telemark should be in the height of the person. On the one hand, shorter skis are more thrilling, manageable and provide a free feeling. On the other hand, longer skis are stable and calmer at higher speeds. At last, skis for freeride should be longer, which ensure more stability and control in deep and unprepared snow.
Binding
The 75mm- binding represents the classical option for telemark skiers. They give the true feeling of the free heel. You have to close the “beak” over the boot and pull the cable over the heel. The most popular and common models have few parts and are very lightweight, solid and a good choice for any application.
NTN- bindings lock the boot at the front and furthermore under the sole. As a result, the boot is more rotationally stiff. There are additional updates and improvements on this binding such as integrated stopper and a step-in-mechanism. For this telemark binding, only a compatible NTN boot is required.
Boot choice
The boot is said to be the most important piece of equipment because it is the connection between the skier and the skis. It should have an optimal fit to provide maximum comfort combined with control and stability. When it comes to the size of the boot, the selection process is the same as in alpine skiing or ski touring. There are two options in boot selection, which depends directly on the type of binding. You can choose between the classic 75mm- “beak” or the NewTelemarkNorm (NTN-) boots.
In the 75mm- boot product options, Scarpa provide an opportunity between 3-pins and 4-pins. The 3-pin boots are a bit lighter and softer since the shank of the boot is shorter. Therefore, they are suitable for beginners, telemark skiers who prefer a soft and comfortable boot or telemark ski tourers, who would like to save weight. The 4-pin boots are more suitable for offpiste skiing because the boot is stiffer and provides higher control and stability at higher speeds by a higher rotational rigidity. All telemark boots have an integrated walking mode and are thus ready to be used for ski touring.
Summary: what you need to know about the different types
Telemark-Allround:
→ ∅ waist width rom 90 – 105 mm
→ low weight: downhill oriented
→ high weight: uphill oriented
Telemark-Freeride:
→ the wider the better
→ weight secondary
→ Ski with rocker: smooth movement
Telemark-Touring:
→ ∅ waist width from 90 – 105 mm
→ not lighter than 1500 Gramm
→ binding with ski touring function
Create your own telemark-set
In our Online-Shop you can create your individual set consisting of skis, bindings, and boots:


Do you feel that you rather want to try this traditional but trendy norwegian discipline? We are happy to give you any advice, also personally in our Sport Conrad → shops.